
 When I decided to open my studio to the blogosphere just a little over 3 years ago, I didn't give too much thought to where my blog would go. I just knew that I made stuff and that it would be good to share that stuff with other like-minded souls who happened to stumble across my blog. I didn't dare to think I'd still be blogging beyond that first year. It had certainly occurred to me that maybe no one would read my blog... that was a scary thought, but I went ahead and blogged anyway. And it was strangely satisfying.... putting ideas out there and sometimes reaching someone who appreciated it. Anyway, here we are 3 years on and I'm still blogging away regularly. I think that's quite an achievement!
So, to celebrate my 3 year blogoversary I'm having a giveaway. For your chance to win just leave a little comment at the bottom of my post. But first, a little tutorial!
Today I'm working with the Sakura Gemcraft Kit. This is one of the easiest ways I know of to create your own dazzling opalescent pendants. The kit comes with full instructions and all the materials you need to create the gems but you'll need an adhesive (I used 3D Crystal Lacquer), a pair of scissors and UV light. You can use good ol' sunshine if you don't have access to a UV lamp.
Select the pendant tray of your choice from the kit and a piece of the black card stock.
 Place the corner of the card into the corner of the pendant tray and use your thumb to impress the edge of the tray into the card.
 Cut out the card just slightly inside the impression.
 Apply 3D Crystal Lacquer into the bottom of the pendant tray.
 Place the card in the bottom of the pendant and leave it to dry completely before moving on.
  Whilst this one was drying, I switched to a round pendant in the following step which I'd prepared earlier.
Apply a thin layer of the UV Base Coat onto the card, making sure it goes all the way out to the edges. You can tease it out with a toothpick so that it just kisses the edges.
 Dip the toothpick into the gem particles......
 and then place the toothpick into the Base Coat, patting down the particles so they lay flat.
 Add a variety of colours until you're happy with how the gem looks. It's good to leave some black space to make the gem really pop!
 Place the pendant tray under a UV light or out in the sunshine for 1 minute to begin the curing process.
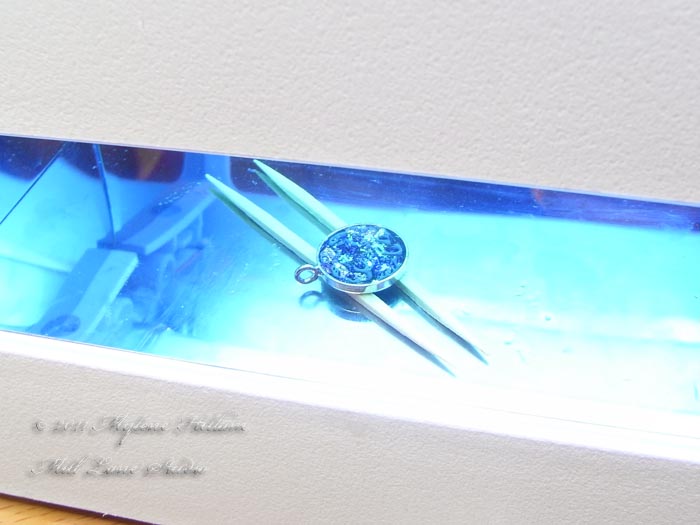 Take a pair of fine scissors and trim away any particles which are sticking up.
 Apply another layer of the base coat and then return to the UV light or sunshine for 3 minutes.
 Finally, apply the UV Top Coat so that it creates a slight dome.
 Return to the light for 15 minutes or until cured.
 It's a really simple process with quite stunning results. Each kit contains 8 assorted pendant trays and enough materials to make many, many more than that.
Now, back to my giveaway. If you'd like to win one of these Gem Craft kits, just leave your comment at the bottom of this post. I'll draw one lucky winner randomly on Tuesday 26th April. Don't forget to check back to see if you've won or if you like, you can leave your contact details so that I can let you know if you're the lucky winner. If the winner hasn't claimed their prize within 3 days I will draw another winner.
'Til next time.....


If you can't get enough of My Tutorials and you want even more inspiration, click here to find my books and printable pdfs


Wow this is a fabulous idea
ReplyDeleteWhat a great tutorial! I love the results too! And congrats on 3 years! You Rock!
ReplyDeleteBarb
Congratulations on your 3 year blogaversary! Awesome tutorial thanks for sharing
ReplyDeleteHugs Julie P
Gorgeous! The pendant looks like black opal, you've yet again given me inspiration :-) Happy Blogaversary, 3 years has flown by! Sara x
ReplyDeleteThey look fantastic and it sounds so easy to do. Thanks for sharing.
ReplyDeleteWhat a wonderful tutorial, you make it look so easy to do. Congrats on your 3 year blog anniversary.
ReplyDeleteCongrats on your blogaversary! It is quite therapeutic to be just blogging away :)
ReplyDeleteLoved the pendant and the tutorial, thanks for putting the work into it. You make it look so easy!
OMGoodnes, I just love it Mylene!
ReplyDeleteCongrats on your 3rd anniversary!
Congrats on your blogversary. Thanks for sharing your ideas. You are such a talented artist!
ReplyDeleteCongrats on your Blogaversary, love stopping by and seeing your beautiful creations. Gillian x
ReplyDeletecongrats on your 3rd blog birthday and thanks for the tutorial on the pendant - looks fantastic!!
ReplyDeleteWow, that is really nice! I would love to have a go at making one. Congratulations on 3 years of blogging! I've only just started.
ReplyDeleteStunning pendant - thanks for the tute! I'd love to make one of these :)
ReplyDeleteCongrats on 3 years of blogging!! I like visiting you here...I dont always comment...but love to come look at what you are doing...so...therefore am glad you kept the blog going!!!
ReplyDeleteThe gem kits look like lots of fun!!
Thank you Mylene! xx
What a great idea. It's beautiful I can't wait to try it out. Congratulations on your 3rd blogaversary.
ReplyDeleteTara
I would love to try this kit out! Thank you.
ReplyDeleteliamsamuel @ gmail.com