I've come up against a design challenge this week whilst creating a bridal hair accessory. Brides usually have a very definite idea of what they want but I was lucky that this bride was easy going and relaxed and was happy for me to design her something elegant and sparkly that suited her petite frame and the royal blue colour scheme of the wedding. What a great brief, but with only a short lead in time to the happy day it didn't leave enough time to order the components I wanted to work with so I had to use whatever components were in stock at my local supplier. I found some great sapphire Swarovski pear-shaped, claw-set sliders to use as accents but this has led to a few challenges trying to find ways of incorporating them into the design. You see, they are sliders and have 2 holes on either side whereas I need either a top-drilled or a centre-drilled crystal for wiring so that the crystal has a stem. So, how do you get around the problem of the holes being in the wrong p......
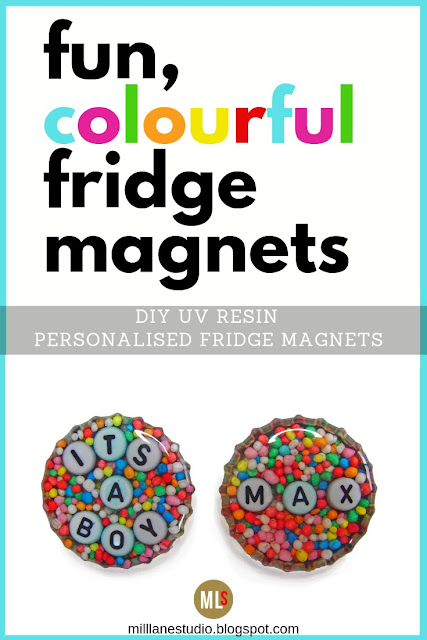
Recently, a very dear friend became a grandmother for the first time. She's so excited to have a grandson to dote over. When bubs arrived, the new parents were showered with gifts. But I thought it would be nice to give the new grandma a small gift too. So I whipped up a pair of fridge magnets that she can use to proudly display some of her favourite photos of bubs where she'll see them all the time. If you're expecting a new arrival in your household, this is a project that is great to get your older children involved in too. It can help an older sibling adjust to having a new baby brother or sister in the house. Or they can make a set for their grandparents who will love such a thoughtful, handmade gift. With close supervision, even young children can help make these! For this project, I've used bottle caps Magic-Glos UV resin alphabet beads and 100s and 1000s . Magic-Glos is non-toxic and has no odour. If you use Magic-Glos, you can have c......
I've been bitten by the resin bug this week. In particular, the marbling bug. When I'm marbling, I look for a mould with a large surface to show off the marbling at its best and I didn't have to look any further than my big chunky wedge ring with the lovely flat top - it was an obvious choice! But you can't just wear your ring straight after you've cast it. There's work to be done.... like trimming it to shape with a sharp knife. And then sanding it to a smooth finish.... always with water to catch the fine resin dust. A well trimmed ring won't need much sanding but there will still be resin powder in suspension so you have to keep rinsing off the white paste to prevent it from scratching the surface as you continue to sand. And you need to rinse off the sandpaper frequently too so the paper doesn't clog up. When it starts to look like this with the grit flaking off, it's time for a new piece of sandpaper. And the final step is the ......
Subscribe to:
Posts (Atom)