Resin art is a fun way to create a piece of contemporary art that you can proudly display in your home. And it's not difficult to get started with pouring resin.
If you've been admiring all the incredible fluid art pieces on Pinterest and want to know how it's done, then this tutorial is for you.
It shows you a simple technique for creating resin cells in your artwork.
The magic ingredient in this project is Resi-BLAST dispersion agent.
Resi-BLAST is a silicone oil designed specifically for use in resin and as its name hints, it repels resin to create cells and lacing. The black and white colour combination of this piece makes the cells even more dramatic!
I've put together a shopping list of all the supplies you'll need to make your own piece of resin art:
Castin'Craft Pigments: Black; White
18" x 18" primed canvas art panel OR cradled painting panel (wood needs to be sealed with acrylic paint or gesso before using)
resi-BLAST dispersion media (aka silicone oil or treadmill oil - look for dimethicone)
Silver powder
Gold Powder
3M painter's tape
8oz graduated plastic measuring cups
Small plastic cups
Disposable acid brushes
Heat gun
Wooden stir sticks
Nitrile Gloves (I like these because of the extended cuff length!)
I've put together a shopping list of all the supplies you'll need to make your own piece of resin art:
Shopping List:
Art Resin pour-on epoxy resinCastin'Craft Pigments: Black; White
18" x 18" primed canvas art panel OR cradled painting panel (wood needs to be sealed with acrylic paint or gesso before using)
resi-BLAST dispersion media (aka silicone oil or treadmill oil - look for dimethicone)
Silver powder
Gold Powder
3M painter's tape
8oz graduated plastic measuring cups
Small plastic cups
Disposable acid brushes
Heat gun
Wooden stir sticks
Nitrile Gloves (I like these because of the extended cuff length!)
Safety glasses/goggles
Chef's Kitchen Torch
Chef's Kitchen Torch
Prepping your Work Space
Before you start mixing resin, there are a few things you need to do first:- Protect your work surface with a plastic painter's drop sheet. Resin is really sticky stuff and you don't want to get it on your table.
- Tape the back of the art panel or painting panel with painter's tape and burnish the edges. This will make it easier to remove any resin that overflows.
- Elevate the art panel on some cups and then level the canvas with a spirit level.
Resin always finds the low point so if your canvas is not level, the resin will flow in that direction, and the patterns you create will flow over the edge of your artwork and onto the table below. That would be so disappointing so a little bit of time spent levelling the canvas is time well-spent.
- Work in a well-ventilated area and wear gloves at all times.
As I mentioned, resin is SUPER STICKY, especially as you get towards the end of your project and the resin is beginning to cure. Everything you touch will get sticky... your cups... your stir sticks... your kitchen torch... EVERYTHING!
When that happens, things begin to stick to you!
Watch this short video for an AWESOME TIP to avoid that happening.
Now that you're all gloved up, let's get started.
Mixing and Colouring the Resin
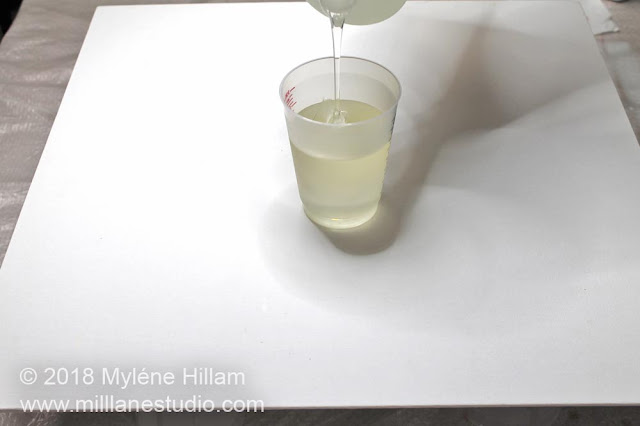
Measure out 125mls (4oz) of Part A and 125mls (4oz) of Part B of EnviroTex Lite in the same cup. Mix the resin thoroughly, following the mixing instructions included in the resin kit.
Pour 30mls (1oz) of resin into each of two small cups. Colour one with silver and one with gold. Use enough powder to make them opaque.
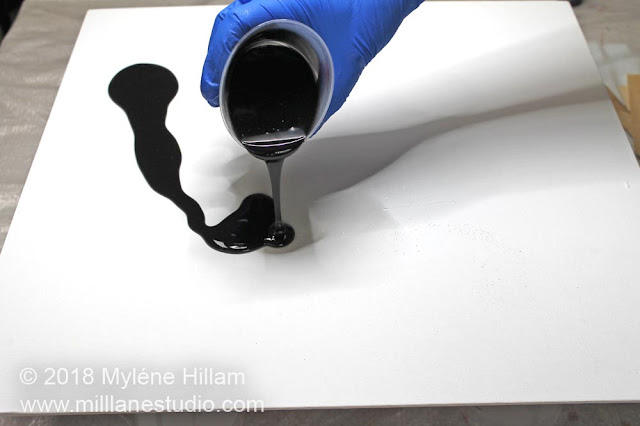
Colour the remaining resin with enough black pigment to make it opaque.
Pour the black resin across the art panel in large bands of colour. Keep some large open spaces for the white resin.
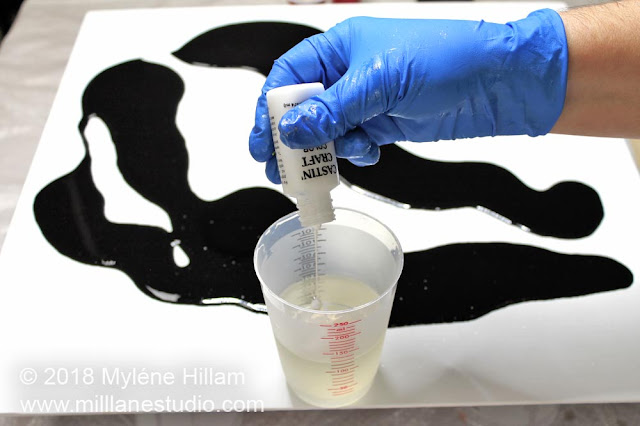
Mix another 250ml (8oz) batch of resin. Pour half into another cup and colour it with enough white pigment to make it opaque. Set the rest aside. (It can be coloured later with either black or white to fill any gaps as needed.)
Creating Resin Cells
The magic ingredient for creating cells and lacing is dimethicone. It behaves like a repellent and disperses the resin.Add 5 drops of resi-BLAST into the white resin and stir through very lightly.
The amount of stirring you do actually determines the size of the cells, so you can experiment with the amount of stirring to get the effect you like.
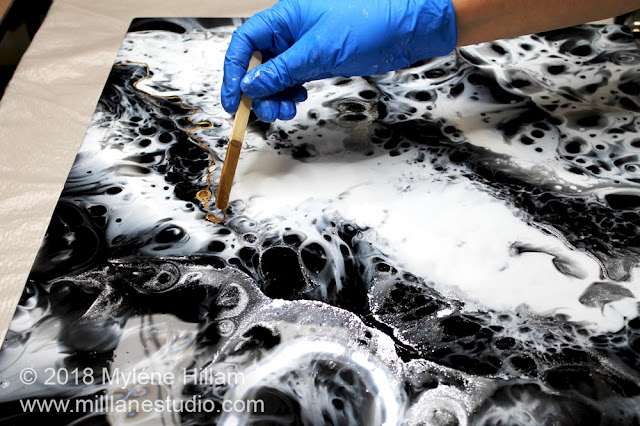
Pour the white resin into the open spaces on the canvas alongside the black. You'll see cells develop where the two colours meet.
Pour the white resin into the open spaces on the canvas alongside the black. You'll see cells develop where the two colours meet.
If the cells don't begin to form, pick up the painting with your gloved hands and tilt the panel just enough so that the resin begins to move. This should open up the cells and create lacey edges.
Drizzle the thickened silver resin along some of the edges where the black and white meet. You don't need to add too much, just to add some highlights.
Drizzle the thickened silver resin along some of the edges where the black and white meet. You don't need to add too much, just to add some highlights.
Learning when to STOP!
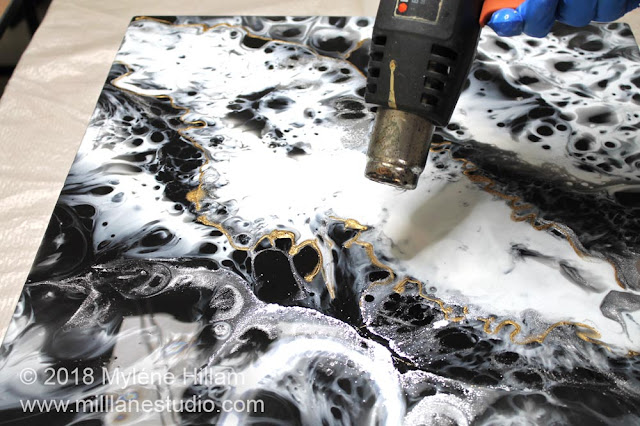
Use the heat gun to move the resin out towards the edges of the canvas. As the white resin moves across the surface of the black, even more cells will open up.Pushing the resin around is fun to do but it's easy to get carried away and you need to STOP!!
If you overdo the heat gun, the colours will mix too much making the patterns overly busy. You want to keep some solid bands of colour to offset the lacey patterns.
If you still have gaps around the edges, pour more resin from the cups to fill them in.
Drizzle some thickened gold resin wherever you would like gold highlights.
Use the heat gun to soften and spread out the gold a little. Keep the heat gun moving at all times and take care not to overheat or burn the resin.
Brush the sides of the canvas with the resin that has fallen onto the drop sheet.
Now your canvas is finished... but the resin will keep moving until it reaches gel stage.
Once you're happy with how the canvas looks, pass the chef's torch across the canvas to pop any bubbles. You may need to do this again a couple of hours later.
At this point, your painting is finished and all you need to do is clean off the silicone oil.
But a clear top coat of resin will give your painting added depth and a glossy finish so it looks really professional.
Either way, you need to clean off any residue from the dispersion media. If any silicone oil remains on the surface of the resin, it will repel the resin topcoat.
You need a soft, dry cloth and some rubbing alcohol or methylated spirits (denatured alcohol). Wipe off all the oil on the surface of the resin.
Mix approximately 375mls (12oz) of EnviroTex Lite (do this in two batches) and pour it across the art panel. Pop the bubbles and leave the resin to cure for 24 hours.
It's almost time to hang your masterpiece. But wait.... there's still tape and resin drips on the back to remove. You can see how to do that in this short video:
Pin this project!
Now that you've removed the tape, go ahead and hang your masterpiece.








Hi Mylene, your resin step by step photos were very useful, thanks to it! I'll keep watching your lovely artworks. Thanks, Marta....:)
ReplyDeleteThanks Marta! I'm glad you've found them helpful.
DeleteThis is an excellent project that I can't wait to do! Thank you for posting!!
ReplyDeleteThanks for taking the time to comment, Nicole. I'm glad the tutorial has inspired you to make your own resin artwork. Have fun, enjoy the process and then most of all, sit back and admire your art on the wall!
DeleteThank you for this fab tutorial.. I will definitely give it a try soon.
ReplyDeleteCheers
Jackie
I'm glad you've enjoyed it. Have fun with this technique and enjoy your masterpiece!
Delete