The cross is a powerful symbol in Christian life and its importance in many Christian celebrations is significant. Whether you're celebrating Easter or a Baptism, this beautiful marbled resin cross is a DIY project you can make and personalise as a centrepiece for your Easter celebrations or to give as a special memento to mark the occasion of a Baptism of either a child or an adult.
Here are the materials you'll need to make one:
Colourants:BLUE VERSION
Castin'Craft Opaque Pigment - white;
Transparent blue resin dye
Castin'Craft Opaque Pigment - white;
N.B. When colouring resin with acrylic paint, add only a drop at a time and stir it through. Keep adding drops until the resin is opaque. If you add too much acrylic paint, the resin may not cure properly.
Pour the white resin in a puddle in the middle of the cross. Spread it across the entire cross.
Drizzle the three blue resins across the cross at an angle.
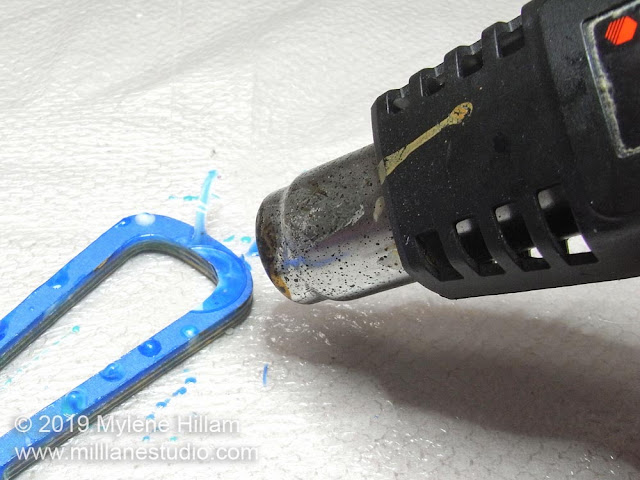
Use the heat tool to feather the stripes a little.
Cover the inner and outer walls of the cross with resin too for a more professional finish. The flat side of the stir stick will help with this.
Castin'Craft Opaque Pigment - white;
FolkArt Acrylic Paints: Parisian Pink; Baby Pink; Color Shift Orchid Flash
Apply the painter's tape to the front of the cross.
Trim away the excess tape around the outside of the cross with scissors and the inside with a craft knife.
It should look something like this.
N.B. Before measuring out the resin, put on gloves as the resin will get sticky.
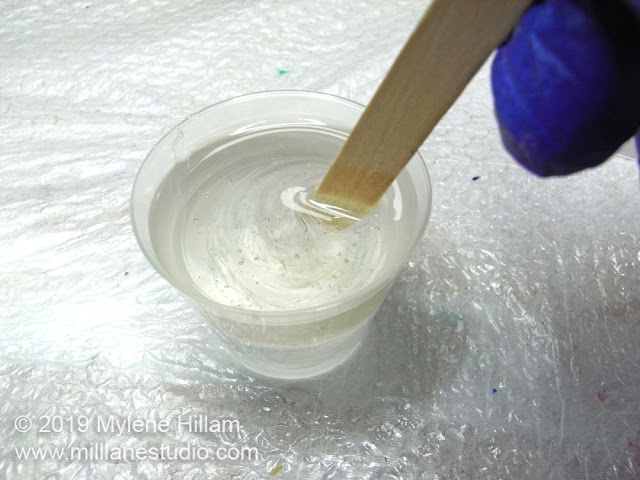
Measure the resin and mix it according to the manufacturer's instructions. You'll need approximately 30mls (1oz) in total for the first side.
Divide half the resin between three shot glasses:
- Epoxy coating resin
- 21cm x 14.5cm (8-1/4" x 5-3/4") Wooden Cross - mine is Nicole™ but choose a cross that you like.
- 2 56mm x 15mm (2-1/4" x 1-1/8") Silver filigree oval connectors
- Ivory acrylic half pearl cabochons assortment (4mm, 5mm and 12mm)
- 5-minute epoxy adhesive
- Crystal Katana or similar jewel pick-up tool
- Heat tool
- Measuring cups
- Disposable plastic shot glasses
- Wooden stir sticks
- 3M Painter's tape
- Scissors and a craft knife
- BBQ torch or gas lighter
- Disposable gloves
Apply the painter's tape to the front of the cross.
Trim away the excess tape around the outside of the cross with scissors and the inside with a craft knife.
It should look something like this.
N.B. Before measuring out the resin, put on gloves as the resin will get sticky.
Measure the resin and mix it according to the manufacturer's instructions. You'll need approximately 30mls (1oz) in total for the first side.
Divide half the resin between three shot glasses:
- Colour the original mixing cup with white pigment.
- Colour one shot glass with transparent dye, one drop at a time so it doesn't get too dark.
- Colour another with the powder
- and the last one with acrylic paint.
N.B. When colouring resin with acrylic paint, add only a drop at a time and stir it through. Keep adding drops until the resin is opaque. If you add too much acrylic paint, the resin may not cure properly.
Pour the white resin in a puddle in the middle of the cross. Spread it across the entire cross.
Drizzle the three blue resins across the cross at an angle.
Use the heat tool to feather the stripes a little.
Cover the inner and outer walls of the cross with resin too for a more professional finish. The flat side of the stir stick will help with this.
Leave the resin to cure overnight.
Working in small sections at a time, use the heat tool to soften the resin drips on the taped side of the cross. Here's a quick video showing you how to do it.
Remove the tape.
If you're going to hang your cross on the wall, then you've finished with the resin part. You can skip down to the decorating.
But if you'd like to use your cross as a centrepiece where it will be viewed from both sides (or you just want to give it a more professional finish), then continue on.
Mix 30mls (1oz) resin and divide it into 3 disposable shot glasses. Colour each one and apply the resin as you did on the other side of the cross. Make sure you apply resin to all the sides as well. Feather the coloured resin with the heat tool.
Pass a BBQ torch or gas lighter briefly across the resin to pop the bubbles.
Working in small sections at a time, use the heat tool to soften the resin drips on the taped side of the cross. Here's a quick video showing you how to do it.
Remove the tape.
If you're going to hang your cross on the wall, then you've finished with the resin part. You can skip down to the decorating.
But if you'd like to use your cross as a centrepiece where it will be viewed from both sides (or you just want to give it a more professional finish), then continue on.
To Make the Cross a CentrePiece
Tape the first side of the cross with painter's tape and trim away the overhang. This is really fiddly but take your time and do the best you can. The better you tape, the better your finished cross will be.Mix 30mls (1oz) resin and divide it into 3 disposable shot glasses. Colour each one and apply the resin as you did on the other side of the cross. Make sure you apply resin to all the sides as well. Feather the coloured resin with the heat tool.
Pass a BBQ torch or gas lighter briefly across the resin to pop the bubbles.
Leave to cure overnight.
The next day, you can remove the tape.
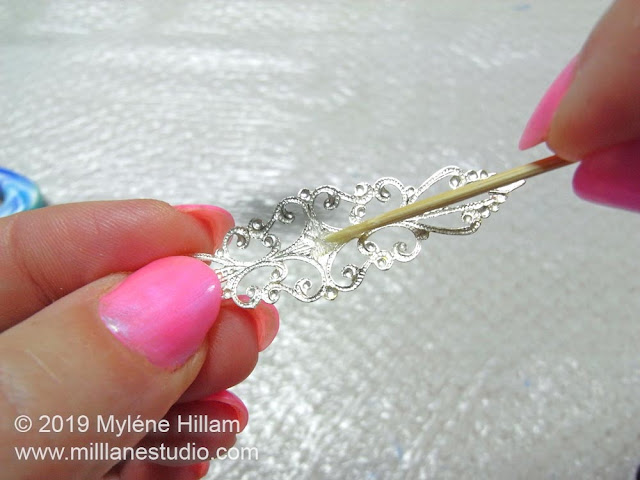
Create a cross with the two filigrees in the centre of the piece. Curve the top piece slightly so that it makes contact with the resin cross on either side.
Mix additional batches of adhesive to attach the half pearls as required.
The next day, you can remove the tape.
Decorating your Marbled Resin Cross
Play with the arrangement of the filigrees and acrylic pearls. Once you're happy with how your piece looks, mix the 5-minute epoxy and attach the pieces one by one.Create a cross with the two filigrees in the centre of the piece. Curve the top piece slightly so that it makes contact with the resin cross on either side.
Mix additional batches of adhesive to attach the half pearls as required.
Lete the adhesive dry before hanging.
Happy Resining!

Subscribe to my email list and learn how to resin like an expert.
Pin this Project!
Happy Resining!

Subscribe to my email list and learn how to resin like an expert.


