These stunning crystal earrings will make you look and feel like a million dollars without breaking the bank. With a sprinkling of Swarovski crystals and a fancy silver stamping, you can create that million dollar look using a combination of flatback and chaton crystals. You just glue and set them in position. It can't get easier than that!
Tools and Supplies
Here's a shopping list to get you started:2 Chatons 4mm, Sapphire
16 Chatons PP18, Crystal
48 Flatback SS6 crystals, Sapphire
4 Teardrop drop crystals 9mm (top drilled), Lt Sapphire or Denim Blue or Sapphire
16 links of silver cup chain PP24, Crystal
2 silver stampings: flower setting joiner
2 cubic zirconia set silver earring wires
10 silver oval jump rings
4 silver jump rings, 4mm
4 PP24 silver cup chain ends
5-minute epoxy adhesive
toothpick
You'll also need: chain nose pliers, flat nose pliers, flush cutters and a Krystal Katana. This tool will become your new best friend when you're setting crystals in a design like this!
How to Make the Chandelier Drop Earrings
Cut two lengths of cup chain, each one with eight links.Place the end link of each chain in a cup chain end and gently press the claw against the crystal with flat nose pliers. Make sure that the crystal is secure.
Dispense a small amount of each part of the 5-minute epoxy and mix it thoroughly. Place a small amount in each cavity of the flower setting using the toothpick. Take care not to place too much adhesive in the cavities or it will ooze out when you position the chatons. Smear the adhesive around the walls of each cavity and then place the crystals in position using the Krystal Katana.
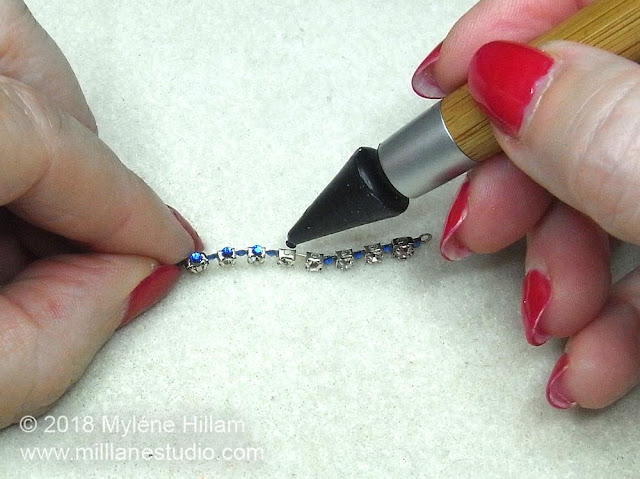
It will take several batches of epoxy adhesive to finish adding crystals to this design so whenever the adhesive begins to set, mix up a new batch. Attach a crystal to each of the connecting links in the cup chain (leave the middle link blank) and one on each cup chain end. When these are secure, add a crystal to the side of each cup. Repeat on the other side of the cups.
Hook a 4mm jump ring through each of the teardrop drops and close it. Open an oval jump ring and connect the teardrop to the middle loop of the flower stamping.
Connect this jump ring to an earring wire with another oval jump ring.
Once the adhesive has dried on the cup chain, connect it to one side of the flower stamping with an oval jump ring. Make sure that the cup chain is facing the front. Attach the other end of the chain to the remaining loop on the stamping. You'll notice that the crystals in the cup chain face outwards rather than to the front, so no matter where the light is coming from, you'll be sparkly!
Open the jump ring on the remaining teardrop crystals and attach them to the bottom link of the cup chain.
And now you have one gorgeous Sapphire Chandelier Drop earring. Make another one to match and then you're ready to sparkle through your next special occasion.
Pin this project for later!
'Til next time....

Want to learn how to make jewellery? Click here to find my books and printable pdfs


This comment has been removed by a blog administrator.
ReplyDelete