Welcome to a world where resin creativity knows no bounds!
Those nail tools and supplies that help nail technicians create stunning manicures can also work wonders in your resin crafting. Yes, you heard it right – emery boards, silicone nail tools, and nail art stickers are about to become your new resin besties.
I want to show you how nail supplies are not just for your fingertips – they're your ticket to unlocking a world of endless creative possibilities.
Whether you're a seasoned resin artist or just dipping your toes into this fascinating craft, you're in for a treat that'll have you saying, "Why didn't I think of this sooner?"
So, let's explore how these tiny tools and supplies can make a big impact on your resin creations! 💅🎨
Here are some reasons why I recommend you add nail art supplies to your resin kit:
- These small tools and supplies are ideal for projects like jewellery, keychains, shakers and small projects
- Nail tools are designed for precision work so they can get into nooks and crannies and other tight spaces
- Nail supplies are generally more affordable than specialized resin supplies and tools.
- They are readily available and can be found in discount variety stores, pharmacies/drug stores, as well as online
- There is a huge selection to choose from, so your resin art can be completely unique.
Now let's look at the nail supplies you can use in your resin crafting and see why they're so useful.
1. Nail files/emery boards for smoothing rough resin.
Nail files and emery boards make short work of cleaning up the rough edges of resin castings.
Nail technicians use them to file down nails but you can use them to smooth out the sharp meniscus on the edge of your castings. They're more comfortable to use than sandpaper and very efficient.
Emery boards come in a range of sizes and grits. These have two different grits on them, so when you've finished with the coarse grit, you can flip the file over and use the finer side.
If the back of your piece will be seen, you can use progressively finer emery boards until you have a glossy finish. Or, finish with a top coat of resin, and the sanded area won't be visible.
When using emery boards for cleaning up resin crafts, keep these tips in mind:
- Let the emery board do the work. You don't need to press hard to file away resin.
- Avoid removing the excess resin too quickly in case you remove too much resin
- Work gently and patiently and only at the edges to avoid scratching the glossy part of the resin.
- Wear a dust mask when sanding resin to protect yourself from breathing in resin dust.
- Better still, apply some water to the resin to avoid resin dust altogether.
2. Cuticle Trimmer
Choose the type with a V-shaped blade, like this one (not the scissor type).
These are ideal for trimming away the flashing from your handmade silicone moulds.
All you do is hold the tool against the edge of the mould with the blade at an angle and it will quickly and easily trim off the excess silicone. It's SO MUCH EASIER than using a pair of scissors or a utility knife.
3. Nail lamp for curing UV resin.
If you're an impatient crafter, UV resin is a good choice for you. It cures so quickly compared with epoxy resin. But you need a UV source to cure it, and a nail lamp is the most convenient way to do that.
This one is my favourite, and here's why:
- It's 36W which is high enough to cure UV resin.
- It has 3 timer settings. The 30-minute setting allows you to leave it on instead of having to reset it every 2 or 3 minutes until your piece cures. (Most lamps only have 90-second timers, which is both inconvenient and annoying!)
- It has a removable bottom so you can slide your pieces in and out of the lamp.
- The removable bottom also allows you to cure taller pieces. Just place the lamp on some supports to elevate it over your project.
I've always found that lamps with UV tubes cure UV resin better and more quickly than nail lamps with LED lights.
Having a UV lamp means you don't have to rely on fine, sunny weather to cure the resin in the sun. That's where a UV lamp comes into its own... it doesn't matter what the weather is like, or whether it's day or night!
4. Silicone nail tools
These silicone tools are very handy to have in your resin kit. Each tool is dual-tipped and has a different tip. I use a set like this (gotta love the sparkly crystals!✨).
Here's 3 ways to use them:
- Use them to gently dislodge bubbles from the bottom edge and corners of the mould.
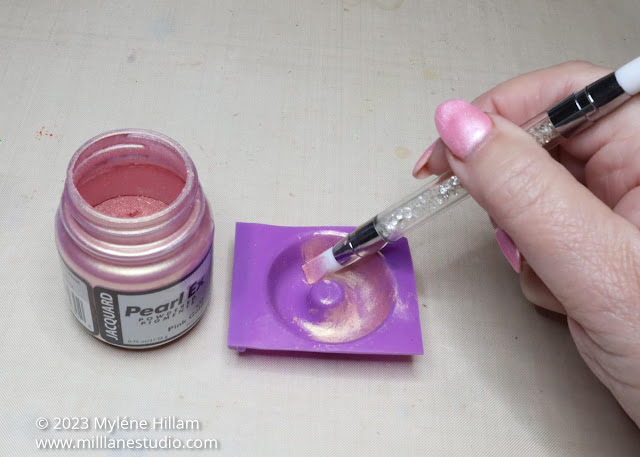
- "Paint" mica powder directly onto the silicone mould surface.
- When you brush mica powder straight onto the design in a detailed mould, you can use a silicone tool to wipe away powder that gets onto places you don't want it.
1. You can use the flexible tips to dislodge bubbles at the bottom of the mould. The silicone tips are gentle on your moulds and don't scratch the silicone like toothpicks do, so they're a really good investment. Anything you can do to eliminate bubbles is money well spent!
2. Use them the way nail technicians do to rub chrome powders onto nails, except rub the powder over the surface of the mould before pouring resin into it.
And then, fill the mould with black resin (or another dark colour) to show off the shimmery effect.
3. Use them the opposite way, too! You can remove stray powder from the silicone when you "paint" the detail of intricate moulds with mica powder. Because your tips are silicone, they won't scratch the surface of the mould so you can press firmly to scrape away powder that has landed in the wrong spot.
5. Nail Polishes
Nail polish comes in a seemingly endless choice of colours and is great for colouring resin.
Pick them up from your dollar store. Or better still, pull out your old nail polishes and use them up.
Just drip the nail polish straight from the bottle into your resin and stir through until it's mixed.
Expert tip: Don't use clear nail polish, even if it's saturated with glitter. For some reason, clear polish turns epoxy amber! Just take a look at the dome on the left below. You'd never know that the resin has no colour other than the silver glitter polish stirred through!!
6. Colour Shift and Chrome Nail Powders
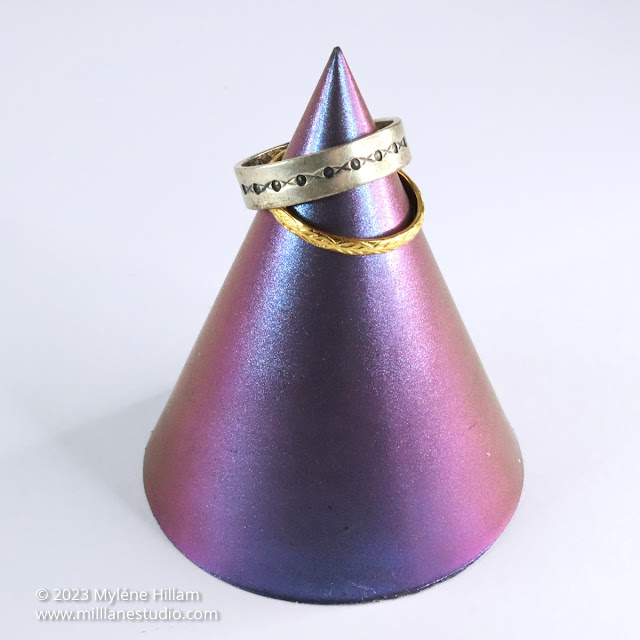
You'll get the best effect with Colour shift powders and Chrome powders when you apply them directly to the mould surface rather than mixing them into the resin.
Different types of moulds give you different effects. For instance, if you have moulds with a flat surface, the colour shift effect is not as obvious.
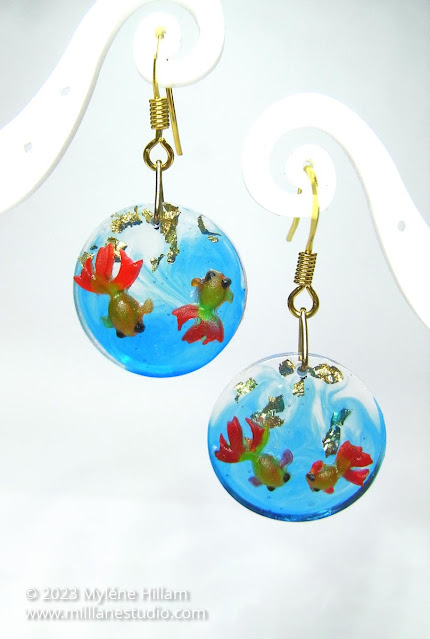
These teeny-tiny silicone moulds can be used to create fillers for resin shakers and elements to add to your resin jewellery. UV resin is a great choice for making these pieces quickly.
Wanna make some cute goldfish bowl earrings? Check out this UV resin earring tutorial and learn how to make these super cute goldfish.
8. Polymer Clay Slices
How polymer clay artists get so much detail into these little sequins always amazes me! These are such FUN fillers for your resin projects - fruit, ocean theme, Halloween, leaves, sweets, or a variety mix.
You should definitely have some nail art slices amongst your resin supplies to use as mix-ins for your resin projects or fillers for shakers.
9. Nail art stickers and decals.
There's an endless array of nail stickers and decals to choose from. They're great for adding extra details to your jewellery projects. Or, you can build bigger designs by combining multiple stickers.
You'll need tweezers to pick them up from the carrier sheet and place them onto the resin. Then just press them down and coat them with a layer of resin to protect them.
Try these if you love gold. For butterfly lovers. Or get the graffiti look (delicate but awesome!). Or if you can't decide, get a little bit of everything.
10. Nail art charms and slime supplies.
These are great to use as mix-ins or add details to your resin projects. Mix them into resin, or glue them on top of your cured resin projects. The more 3D ones are great for embellishing jewellery and phone cases, while the flat ones can also be used as fillers for shakers.
If you're looking for a fantastic selection of Christmas-themed charms, try this collection. Each piece is filled with sparkly crystals for added bling!
So now you can see how nail supplies are a resin crafter's BEST FRIEND. You owe it to yourself and your budget to check these items out!
Pin This for Later!
Happy Resining!

Subscribe to my email list and learn how to resin like an expert.


.jpg)


