This stunning bottle-style pendant is surprisingly easy to make. You just need an assortment of bead caps and a couple of crystals to add some sparkle to this special rose cluster bead.
Here's a shopping list to help you out:
- Feature bead of your choice. I used Jesse James Feeling Rosy bead from Grenadine Strand #2 (discontinued)
- 4mm and 6mm crystal bicones to suit your feature bead
- An assortment of bead caps
- 70mm long headpin (you need really long headpins for this project)
- Beadalon snake chain kit
- Clasp
- 2 x jump rings
Tools: 2 pairs chain nose pliers; Round nose pliers; Flat nose pliers; Flush cutters; Bead mat
Work Out Your Design
To design your bottle pendant, sort through your bead cap mix and find combinations that work well together. Starting with the base, string on a 3mm bead cap (or a round spacer bead). This will act as a stopper so that the first bead cap doesn't fall off if it has a large hole.Now, create the base and stem.
Try different combinations of bead caps: some bell shaped, some flat, some cupped. Place multiple pieces together to create fancy shapes, or string some upside down to give them a different look.Include the 6mm Swarovski crystal in the stem and add the feature bead so you get a really good idea of how it will look. Just keep trying the bead caps in different combinations until you like what you see. I eventually went with number 2 because I liked its balance.
Now do the same thing with the top. String different combinations of bead caps to create a fancy-shaped top for your faux perfume bottle. Include the 4mm Swarovski crystal in the top as part of the "cap". This time I went with the third combination.
Once you're happy with the design, firm all the bead caps into position so they nestle inside each other and there's no play in them. Grip the head pin above the last bead/bead cap with chain nose pliers and bend it at a 90° angle above the pliers.
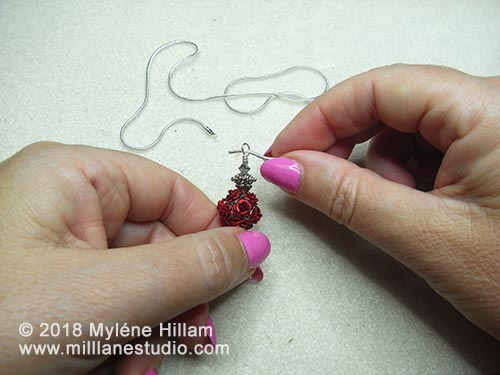
With round nose pliers, create a loop large enough to string your chain through. Finish with the tail of the head pin on the side so that you have a complete loop.
Hold the loop with one pair of pliers and grip the tail with the other pair. Wrap the tail neatly around the neck as many times as you need to. This will keep the components firmly in position so that there is no wiggle room. Two to three wraps is a good balance. If you need more than this, then make the neck shorter next time.
Trim away the excess tail close to the neck.
Make the Chain
Decide how long you'd like the pendant to be and take away the clasp length from this measurement. I cut my chain to 50cm (19.75") and with the clasp and jump rings added, it measures 52cm (20.5") long.
Place one end of the chain into the chain end. You can glue it into position if you wish, but this is optional. Suitable adhesives would be GS-Hypo Cement or super glue. Grip the loop and the very tip of the chain with the chain nose pliers. With flat nose pliers in your other hand, press one flap of the chain end over the chain. Do the same to the other side. Give it a gentle tug to make sure it's secure. If not, press the flaps down more firmly and then tug again.
String the other end of the chain through the loop of the pendant. Attach a chain end to this end of the chain in the same way.
Connect the ends of the chain to the clasp with jump rings.
Your Mum will love receiving such a beautiful handmade gift. And every time she wears it, she will remember how much you mean to her.
Pin this project for later!
'Til next time.....

Want to learn how to make jewellery? click here to find my books and printable pdfs


