If you've got the resin bug and have started making resin charms and
cabochons, you no doubt want to turn them into head-turning pieces of
jewellery that everyone swoons over. After all, you've spent time and money
and poured not only the resin but your creative heart into these pieces, so
you want them to look professional and have that exclusive designer
look about them. Right?
But you probably didn't give too much thought to how you'd assemble the charms
once they cured and now you're asking yourself
"How do I turn all these charms into jewellery?"
Well, there are many ways to assemble your resin casts into jewellery and
wearable accessories.
You can get as creative as you like with your designs but before you can do
that, you'll need some basic methods that will allow you to connect pieces
together first.
Here's a few ideas that you can try:
- Glue on a flat pad components
- Drill a hole
- Embed a finding in the resin as it cures
- Wrap with a filigree to hold the cabochon in position
Want to see what these methods look like in real life? Then read on!
1. Use a Flat Pad or Glue-on Component
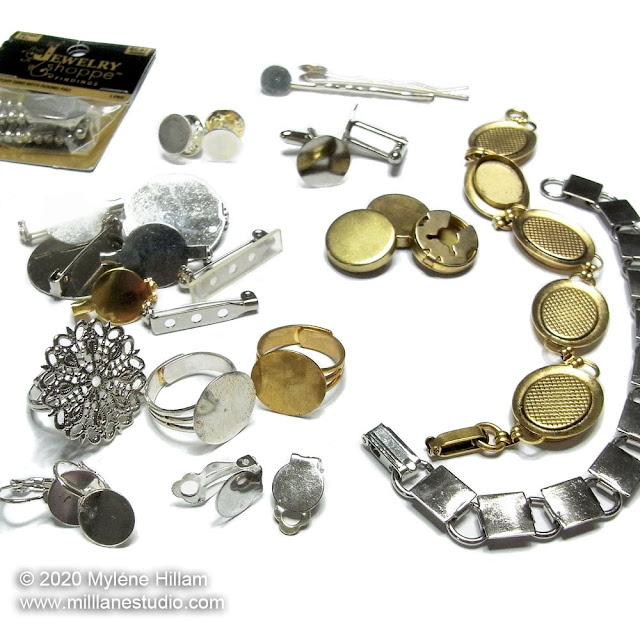
Flat pad jewellery blanks come in so many styles and there's one for every
type of jewellery that you can imagine, from shoe clips to hair barrettes, and
every piece of jewellery that comes in between, making them very useful for
turning your resin castings into fabulous resin jewellery and accessories.
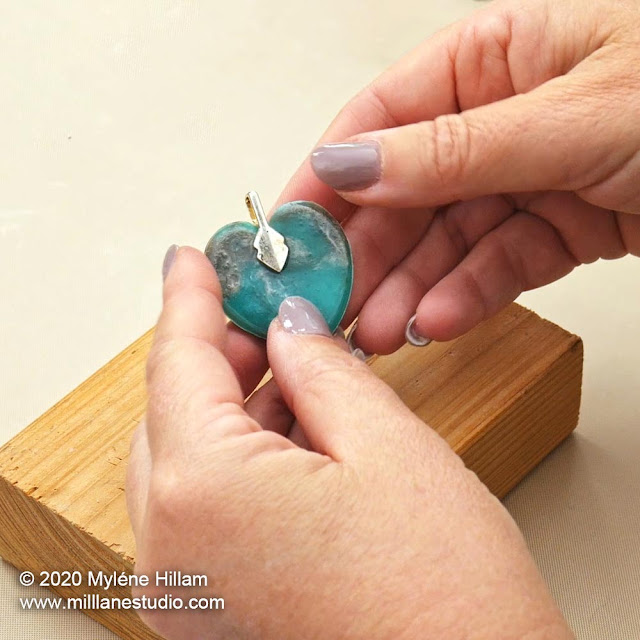
Flat pad jewellery findings are easy to use: Just apply a strong adhesive to
the flat pad and position the resin cabochon into place. This one is a pendant
bail and it's glued onto the back of the casting, ready to be strung on a
chain.
Once you've got your flat pad jewellery blanks, you'll simply glue the resin
cabochon onto the blank.
Not sure what type of adhesive to use?
In the studio, I use and recommend
5-minute epoxy in the syringe pack
because it bonds metal and resin strongly. If you have a lot of pieces to put
together, buy the one with the mixing nozzles and it will mix the two parts of
the adhesive as it dispenses it. The nozzles are single-use, so for future
jobs, just dispense equal parts from the syringe and mix with a wooden stir
stick. This is the correct way to mix 5-minute epoxy to make sure your bond is strong and secure.
Many crafters prefer
E6000 industrial-strength
glue which is another good choice. You can buy it in a mini tube so you don't
have to worry about it drying out and it includes 3 fine tips for
precision placement of the adhesive.
2. Drill a Hole
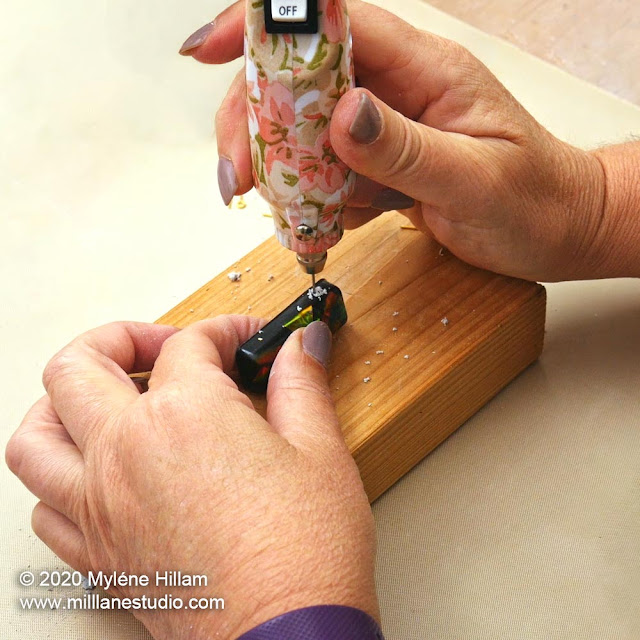
Use a 1mm drill bit and drill a hole in the cabochon.
I'm using my trusty battery-operated Her Embosser Hobby Drill which is lightweight and easy to handle for small drilling jobs like
this. It has a 1mm drill bit which is the perfect size for jewellery findings
and other stringing materials.
I love this drill because it's lightweight and portable. It delivers enough torque to drill through the resin without melting it as it drills. Plus, it's very pretty! But if you're not into flowers, it also comes in a camo finish.
Safety note: If you're using a more powerful drill than this, use a vice
to securely hold the cabochon in place while drilling. You'll need to use the lowest speed on the drill to avoid it heating the resin and gumming up the hole as you drill.
If you're using a Dremel or similar rotary drill, a drill press will ensure you drill straight through your cabochon or charm. You'll need to purchase a smaller collet and drill bit.
If you've drilled a hole in the top, glue in an eye pin or screw eye so
that you can attach an earring wire or string it on a chain. Use 5-minute
epoxy adhesive if you're in a hurry. Or if you prefer a seamless finish, mix
up some of the resin you made your casting with.
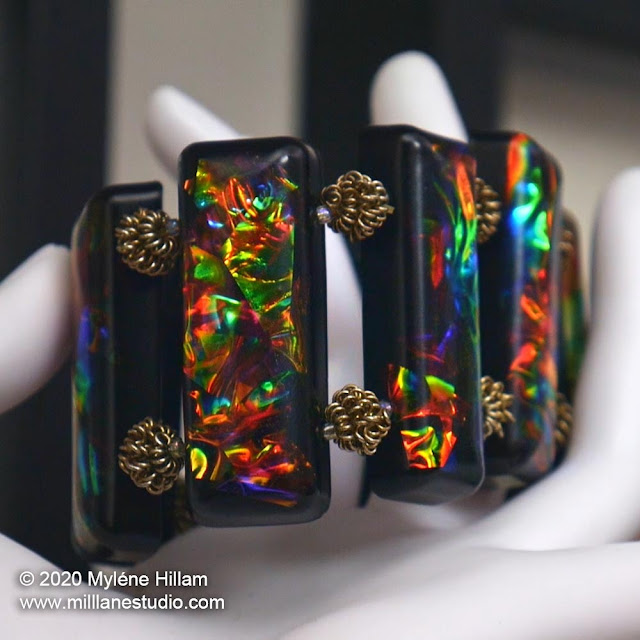
You can also drill your castings sideways...
This will allow you to string through the middle of the casting...
and turn your pieces into a bracelet.
Mini craft pegs are ideal for column moulds because they're so lightweight and
can balance across the top of the mould without causing it to topple over.
And the bonus is the detail on the back of the piece. Here, the stringing
material has been threaded through the filigree.
If your casting is thin enough,
drill a hole from front to back and insert a
pinch bail
to finish your cabochon off. Pinch bails come in a variety of sizes and add
a more professional look to your resin pieces than jump rings, but jump
rings will also work for smaller charms.
3. Embed a Finding in the Resin
If you don't have a drill, then this little trick is a good one to know. You
can embed the findings in the resin before the resin cures. Use a
mini craft peg
to hold a shortened eye pin in place whilst the resin cures.
Once the resin has cured, you can remove the peg and then demould the resin
cast. If it's hollow, top it up with a bit more resin and let it cure.
You can also embed findings by adding them after the resin has cured. If you
have a hollow back on your casting from where the resin has crept up the
walls of the mould, you can top up the back with resin and place a finding
in it to cure. Use 20g wire or an eye pin and create a coil and centre it in
the back of the casting. Once the resin has fully cured, you can
turn a loop to string it from.
4. Use a Filigree Stamping to Hold the Resin Cabochon
I love filigrees... they add a touch of vintage, old-world elegance to even
the most modern piece. Choose a brass stamping larger than your cabochon and
wrap it around the resin. Use pliers to press the stamping firmly onto the
resin. The filigree will act as a cabochon setting with claws and hold the
cabochon securely in your jewellery design.
Get more assembly ideas here in this video
Happy Resining!

Subscribe to my email list and learn how to resin like an expert.
So now that you've got a few different ways of assembling your jewellery,
go out there and create your own OOAK jewellery pieces and wearable
accessories that look like they came from an exclusive, designer boutique!
Pin these Ideas!
Happy Resining!

Subscribe to my email list and learn how to resin like an expert.


