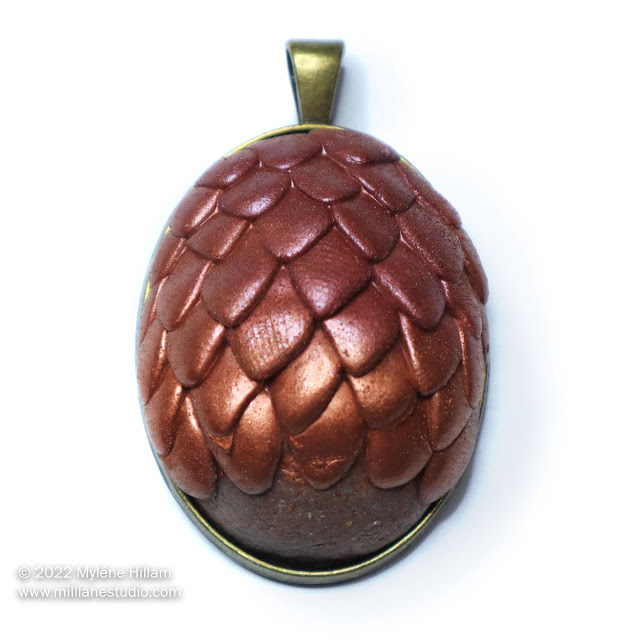
Game of Thrones fans and LARP aficionados, you know you can't resist a good dragon's egg. Those 3 Dragon's eggs made famous by Danaerys Targaryen have inspired numerous tutorials using all sorts of materials and techniques to create dragon's eggs from miniature size right up to "life-size" eggs. I made this SUPER AWESOME dragon egg pendant using resin and mica powder from a mould I made myself. Before I could do that, I had to MAKE the silicone mould... And before I could do that, I had to create a dragon egg from clay to make the mould. So that's where we're starting today - creating a dragon egg from clay that we can make a mould from. If you want to skip these steps and work with a premade silicone mould, go straight to the resin tutorial to make this spectacular pendant. If you want to start from scratch and make your own dragon egg mould, read on. Materials (to make the original egg and mould): Apoxie Sculpt or similar epoxy clay Easy......
mould making
Showing posts with label mould making. Show all posts
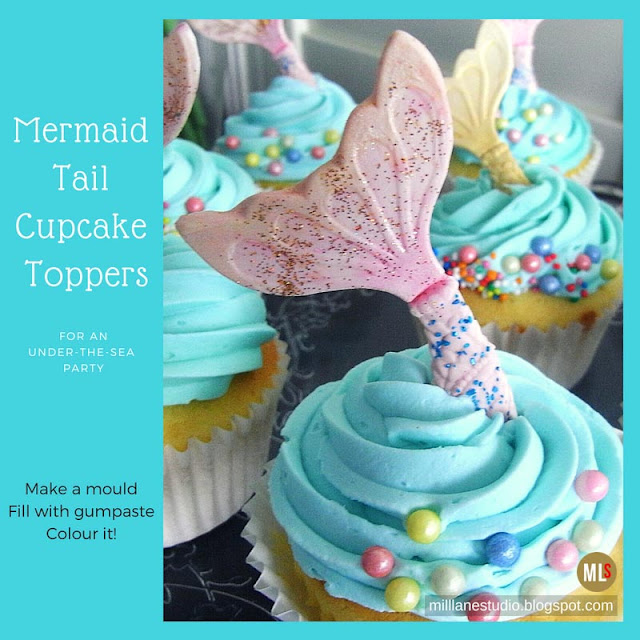
What little girl wouldn't be thrilled to have mermaid cupcakes for her birthday party? Or for that matter, what big girl wouldn't want mermaid cupcakes? After all, inside every big girl is a little girl at heart! So I'm decorating a batch of these for my Mum's upcoming birthday celebration. But to start, we need to make a mould and I found the perfect item to make one from whilst I was wandering through the toy aisle recently. So, let's get started. Here's what you'll need to make your own: EasyMold Silicone Putty - This is a food grade silicone and it's FDA compliant so it's perfect for this project Mermaid doll with a plastic tail about 7.5cm (3") long White Gum Paste Pastel Pink edible paint Edible Pearl Gold lustre dust Edible Pink lustre dust Edible glitter - Light Blue Disco Glitter - Gold Paintbrush cupcakes frosted with blue buttercream icing Make the Mermaid's Tail Mould Measure out equal parts of Parts A a......
My son has put in a special order for some personalised gifts to give to his friends for Christmas. They are all in their early 20s and enjoy having a quiet drink together so we decided that resin drink coasters would make a great gift. No problems, I thought. But before that can happen, I need a mould so today I finally had reason to do something I've wanted to do for a long time: create a silicone coaster mould. To make the mould making process easier, I invested in a mould box and I've got to say that this is simply the best investment I've made in quite a while. All you have to do is clamp the four walls together, putty the gaps so the silicone can't leak out and your mould box is ready to use. After securing my master to the bottom of the mould, I mixed and poured the silicone around it and then waited for it to cure..... too easy! The plan is to make several of these moulds so that I can cast a whole set of coasters at a time but unfortunately, t......
Ahoy me maties..... there's something a bit fishy going on today! Starfishy, to be precise! One of the items I had to prepare for the Glass House resin workshop kits this weekend is a batch of polymer clay starfish. It's really hard to come by the real thing these days so a while back I made a mould of a tiny little starfish and began casting my own. Actually, it was a two step process - I didn't really like the original starfish shape. It was too rigid and a bit too small. So I cast a starfish from that mould and then set about manipulating it into a slightly larger, and much more interesting starfish. I turned this one into the mould I use for these great little starfish. But it's a fiddly little piece to get out of the mould so today I want to show you not only how to get it out but also how to give it a bit more personality before baking it. I use beige and white Sculpey mixed together in roughly equal quantities and then pinch off small balls. Roll the ba......
Subscribe to:
Posts (Atom)