Game of Thrones fans and LARP aficionados, you know you can't resist a good dragon's egg.
Those 3 Dragon's eggs made famous by Danaerys Targaryen have inspired numerous tutorials using all sorts of materials and techniques to create dragon's eggs from miniature size right up to "life-size" eggs.
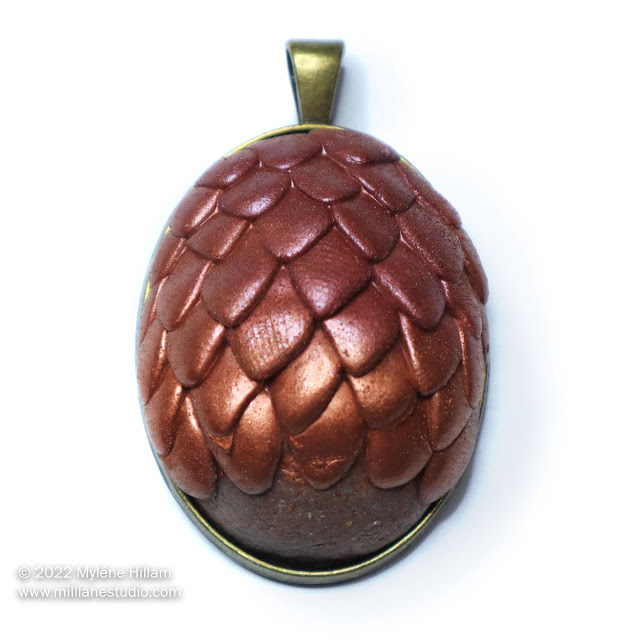
I made this SUPER AWESOME dragon egg pendant using resin and mica powder from a mould I made myself.
Before I could do that, I had to MAKE the silicone mould...
And before I could do that, I had to create a dragon egg from clay to make the mould.
So that's where we're starting today - creating a dragon egg from clay that we can make a mould from.
If you want to skip these steps and work with a premade silicone mould, go straight to the resin tutorial to make this spectacular pendant.
If you want to start from scratch and make your own dragon egg mould, read on.
Materials (to make the original egg and mould):
- Apoxie Sculpt or similar epoxy clay
- EasyMold Silicone Putty
- Plastic craft egg, 28mm x 38mm (1-1/8” x 1-½”)
- Nylon scourer
- Clay blade
- Utility knife, scalpel blade or scissors to cut the egg
- Teflon craft sheet to work on (the clay will peel off it when cured)
- Talcum powder
- Gloves
- 30x40mm pendant bezel (use this to test your egg will fit)
Tip: Epoxy clays are very sticky. Always wear gloves when mixing epoxy clay and dust your work surface, tools and gloves with talcum powder whenever the clay begins to stick to them.
I chose epoxy clay over polymer clay for this project because...
... it doesn't shrink like polymer clay
... it cures on its own (no baking required!)
... you don't need to worry about the plastic egg melting in the oven.
Create the Dragon Egg Original (aka Master)
1. Cut the plastic egg in half from top to bottom.
2. Measure out equal quantities of Part A and Part B of EasySculpt.
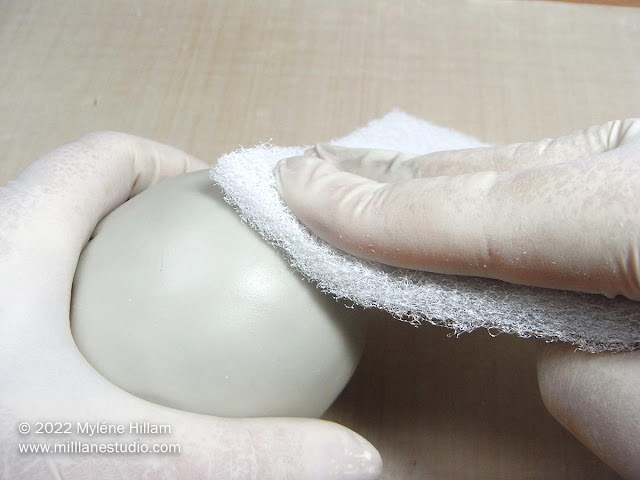
4. Flatten the clay into a circle and place it over the egg. Work it out to the edges and trim the excess away. Rotate the egg between the palms of your gloved hands to smooth out the surface.
5. Place the egg into the bezel and check that you have enough clearance to accommodate the thickness of the scales. If it’s a tight fit already, make sure that you leave a gap at the edge of the egg as you apply the individual scales.
6. Texture the bottom third of the egg by pressing it into the scourer. (image not to scale - for illustration purposes only)
7. The texture should look something like orange peel.
8. Mix a small batch of EasySculpt and set it aside to firm up for 30 minutes.
Roll the clay into three thin logs of varying thicknesses. Line the three logs up and use the clay blade to slice each one into ¼” pieces.
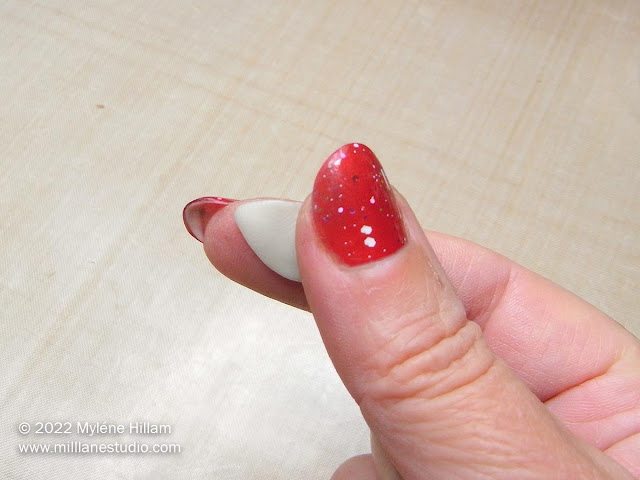
9. Roll each piece into a ball and flatten the balls between your thumb and finger creating a point at one end.
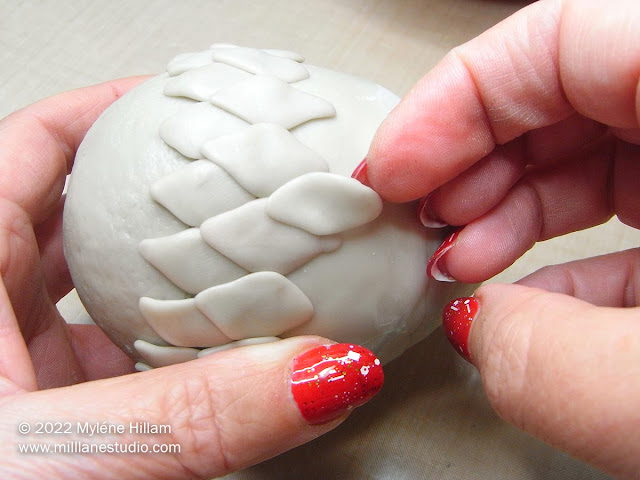
10. Beginning with the large scales, arrange them side by side (with the points facing down) in an arc around the egg, about half an inch from the bottom.
11. Add another layer of large scales overlapping the first layer. Repeat with the medium scales and the small scales until the top two-thirds of the egg is covered. Set the egg aside to cure overnight.
Create a Silicone Putty Mold
12. Measure out equal quantities of Parts A and B of the EasyMold Silicone Putty. Mix the two parts together until there is no marbling.
13. Place the putty over the egg and press it down over the entire surface to pick up all the scale details, making sure it is at least 6mm (¼”) thick all over. Turn the egg over and press it lightly onto your work surface to flatten the back so that it will sit level when you pour resin into it.
It will take about 25 minutes to cure. Once it's set, you can remove the master dragon egg.
If you want more detailed instructions for making silicone putty moulds, read this post.
Make a Resin Dragon Egg Pendant
Want to turn your dragon egg mould into a collection of spectacular dragon egg pendants like these?
It's a lot easier... and FASTER... than you might think.
These dragon eggs might look challenging to make... that is until you see the outrageously easy colouring trick that gives the eggs their gorgeous shimmer.
You can be wearing these legendary egg pendants in just 30 minutes from the time you mix the resin. How SUPER FAST is that... no waiting 24 hours for each one to cure!
Here's what you need:
Dragon egg silicone mould (try this one if you don't want to make your own)
Soft brush
Stir sticks or an acid brush
See how to make these AMAZING dragon egg pendants in this short video.
Don't leave just yet. SIGN UP to get my emails full of resin tips, info and offers.
Love this Tutorial? Pin it For Later

Subscribe to my email list and learn how to resin like an expert.


