I LOVE Christmas and all the feel-good festivities that bring my family and
friends together at this magical time of the year.
When Christmas starts appearing in the shops in October, I'm excited to check
out the season's colour trends and admire all the beautiful ornaments that are
this year's must-have decorations.
It feels like you have months to get your holiday decorating organised in
October.
And then suddenly, it's December... Christmas is just around the corner, and
the shops are starting to sell out of all the beautiful decorations you had
your eye on.
Never fear... if you've got resin and a mould, you can make your own
gorgeous holiday ornaments that will make your tree beautiful, and they
will have even more significance because YOU MADE THEM.
These 3 elegant ornament designs were all made using
just a single mould. So you're probably thinking it will take days to
make them. But not so... I poured and demoulded all three of these in
less than one hour!
"How do you get the resin to cure that FAST?" I hear you ask.
The SECRET is to use a quick-curing resin.
Quick-curing resin is the perfect choice when...
- you're impatient and can't stand waiting 24 hours for the resin to cure
- you need to make a project in a hurry
- you like instant gratification (you can demould your project just 20 minutes after pouring!)
- you don't have to colour the resin because this resin cures white
- you can re-use the mould again in 20 minutes.
This is a SUPER SIMPLE colouring technique. The colouring is done
BEFORE you pour the resin into the mould. And this is the most
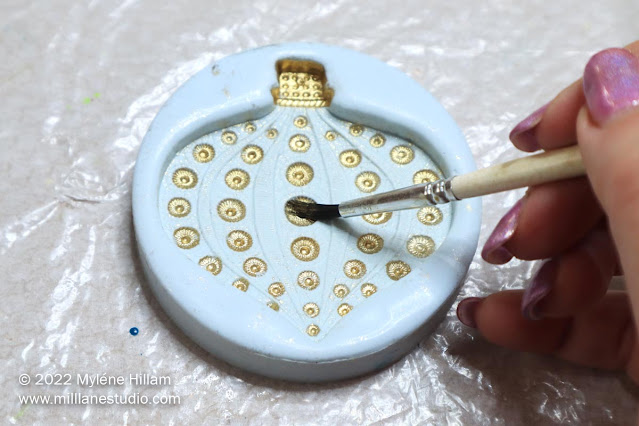
time-consuming part of the project. You literally "brush" the powder straight
onto the silicone. When you remove the resin from the mould, the powder has transferred straight onto the resin!
I'm not gonna lie; brushing the colour onto the detail of the mould can be
fiddly, especially cleaning up the stray bits of powder. But the more
attention you pay to that, the better your end result will be. So, let's get
on with it.
Here's what you'll need:
RESIN
Quick Curing Polyurethane (aka urethane) resin - try any of these white-curing
resins:
- FastCast- Barnes Easy Cast
- Aldax Craft Cast
- Smooth Cast 300
MOULDS AND OTHER SUPPLIES
- Silicone bauble mould* (see note below)
Happy Resining!

Subscribe to my email list and learn how to resin like an expert.
- Silicone bauble mould* (see note below)
- Light Siam flatback crystals -
super sparkly
or
budget-friendly
- metallic gold ribbon
- 5-minute epoxy
- graduated measuring cups
- metallic gold ribbon
- 5-minute epoxy
- graduated measuring cups
-
Hand-held USB-operated drill (optional)
*I used a Krafty Lady mould which has been discontinued. In case you're
able to hunt down a second-hand mould, it's AM206.
What Type of Moulds Work Best for the Brush-on Powder Technique?
The easiest ones to work with have open elements so you can easily brush the powder onto the detail. Moulds with deep, narrow detail are best coloured with acrylic paint AFTER the resin has cured.
Consider these points when you're looking for suitable moulds
- Look for moulds with raised sections
- Choose ones with flat or open areas (to brush the powder on)
- For moulds with fine, deep details, you'll need to brush the powder on the raised areas because it's too difficult to get your brush into narrow recessed areas
Here are some moulds that I've used this technique on:
Christmas ornaments
Christmas bauble moulds
Christmas bauble moulds
Christmas ornaments/keychains
Tip: These make great gift toppers!
Dry Brushing the Powder onto the Silicone
The beauty of this project is that the powder sticks to the silicone
and then when the mould is filled with resin, the powder lifts off the silicone and permanently sticks to the resin. This means that you don't have to paint
the resin with acrylic paints that can scratch or rub off in time.
I've already mentioned that these 3 baubles were all made in the same
mould... I just picked out different details of the mould to highlight
with gold powder: there are the dots and two different striped sections
that can be accentuated.
In this tutorial, I'm colouring the dotted section, which was the
fiddliest of them all by a long way... not the painting, but picking up
the stray powder off the silicone for a neat finish.
Start by dipping your brush into the powder and brush it onto the detail
of the mould.
Tip: Don't load the brush with too much powder. The less
powder you have on your brush, the less stray powder you'll have to
clean up.
How to Get CLEAN Edges on Your Design
Once you've highlighted the detail, clean up the powder from any areas you don't want it. Adhesive tape is excellent for cleaning up silicone moulds. Use a small length of tape with the tip of a toothpick.
Take your time doing this, or you'll accidentally remove the powder from the
detail. You can always add more to fill in the gaps but then you'll have to clean up the edges again.
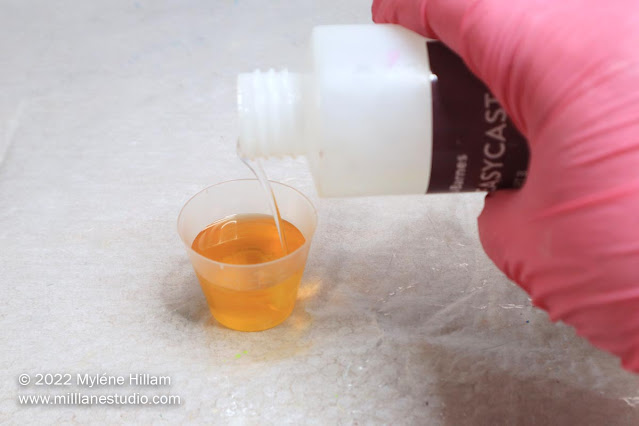
Measure out the resin and hardener. All the resins I've suggested are 1:1
ratio resins. That means you need equal quantities of each part. This mould
takes 20mls (2/3oz), so 10mls of each.
Mix the resin and hardener together until you can't see any streaks. It will
start to heat up (cure) in around 30 seconds, so work quickly.
Pour the resin into the mould.
And then sit back and watch it turn from amber to white right in front of
your eyes!
It's ready to be demoulded in about 20 minutes. Each brand of resin takes a
slightly different amount of time to cure.
Run the leafing pen along the edge of the resin.
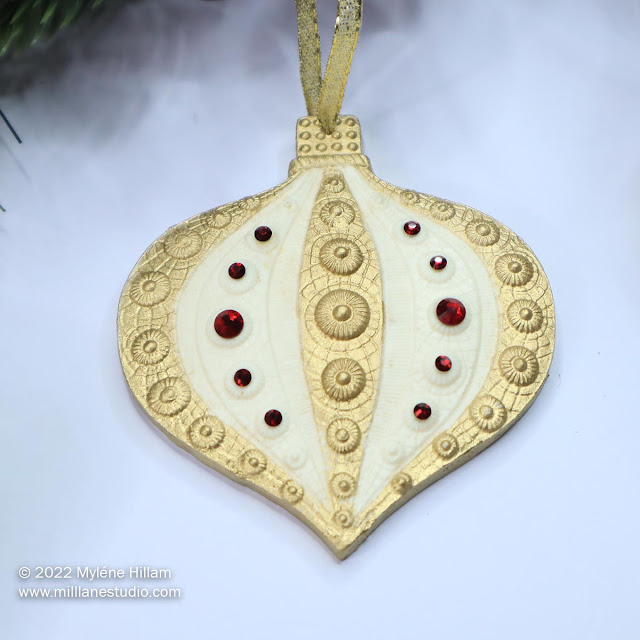
To add the crystals to my ornaments, I had to grind the knobs flat, using
the drill and a grinding bit. (I forgot to photograph the spotted bauble so
here's one of the two striped baubles.)
Mix up the 5-minute epoxy and attach the crystals.
Some resin moulds don't have a hole, like mine, so I used a 1.5mm drill bit to create the
hanging hole. If your silicone mould already has a hole, you won't have to
do this.
You can drill the hole from front to back (like mine), side to side, or straight down from the top of the ornament. If you use the last option, you will need to glue an eye screw into the resin for your hanging point. Use a strong adhesive like 5-minute epoxy to make sure it's secure.
Finally, thread the ribbon through the hole and tie a knot. Now they're
ready for hanging on your tree.
Here's a closer look at each one. Gorgeous, aren't they?!!
Pin This Project Tutorial!

Subscribe to my email list and learn how to resin like an expert.


