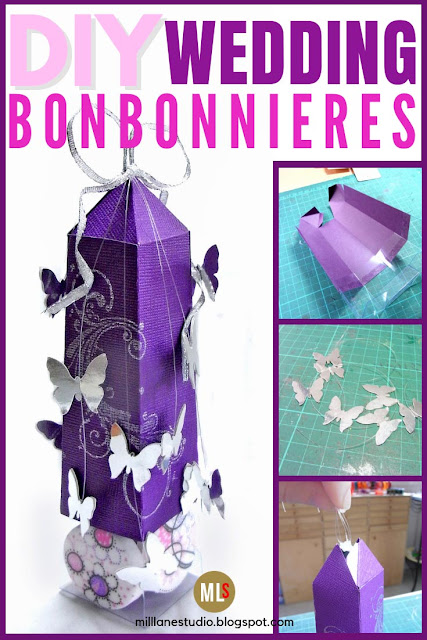
I've started with a Krafty Lady template and traced it onto the back of purple card stock, scored the fold lines and then cut it out. These templates are no longer available but you can find templates of all shapes and sizes online. Or you can save yourself a heap of tracing and hand cutting by using a die and running it through a die cutting machine.
I want my bonbonnieres to be see through so I'm using acetate for the bottom section. To do this, cut away the bottom 3.5cm (1.5") of the box. At this stage, decorate the outside of the box if you wish. I've used a simple flourish stamp and Encore silver metallic ink.
Line up the card stock with the template, apply double sided tape along the bottom edge of the card and attach a piece of acetate. It's difficult to see it in the photo but you can just make out the tape line - the acetate extends beyond the template.
Trace around the template with a fine tipped permanent marker.
Cut it out and then score all fold lines. Wipe away any visible marker lines with methylated spirits (denatured alcohol). Punch out a neat finger slot for opening the box with a 1/2" circle punch.
To create the little fountain of butterflies cascading from the top of the bonbonnieres you will need hot glue and six 15cm (6") lengths of nylon beading thread. Squeeze out a blob of glue onto a nonstick mat and place the individual lengths of nylon into the glue, one at a time.
Try to place them so that they will drape in different directions. Add more glue if it has cooled too much to add the six strands.
Place double sided tape along all the fold-over tabs. Remove the carrier from the long side and align the fold with the edge of the box. Leave the carrier on the tape at the top of the box. Punch a small hole at the point (to accommodate the strands) and then place the glue blob into the top. Remove the carrier and press the flaps firmly into place.
It should look something like this.
Punch out 24 butterflies using a Martha Stewart Butterfly punch. I've used silver mirror board. Tape a butterfly to the bottom of each strand.
Apply double sided tape to another butterfly and place the two
butterflies back to back so they are securely on the nylon.

Place another pair of butterflies half way along the same thread. Repeat on all six strands, varying their positions and trim some of the strands shorter.

Cut a 30cm (12") length of wire edged silver ribbon, tie into a bow and glue on top of the box.

A very pretty, very purple, butterfly bonbonniere, filled with........ Well, you'll have to check it out here to see just what I did fill them with!
Pin this Project!
'Til next time.....

If you can't get enough of My Tutorials and you want even more inspiration, click here to find my books and printable pdfs


